Plugin Repo
Adds support for slicing via Slic3r from within OctoPrint
Slic3r plugin for OctoPrint
WARNING
This plugin has been successfully tested for the following cases:
- Linux: Slic3r’s stable versions 1.1.7 and 1.2.9 (tests done under a Raspberry Pi 2, but it should work for other Linux distributions).
- Windows: Slic3r works for version 1.2.9, not doing it for version 1.1.7.
Setup
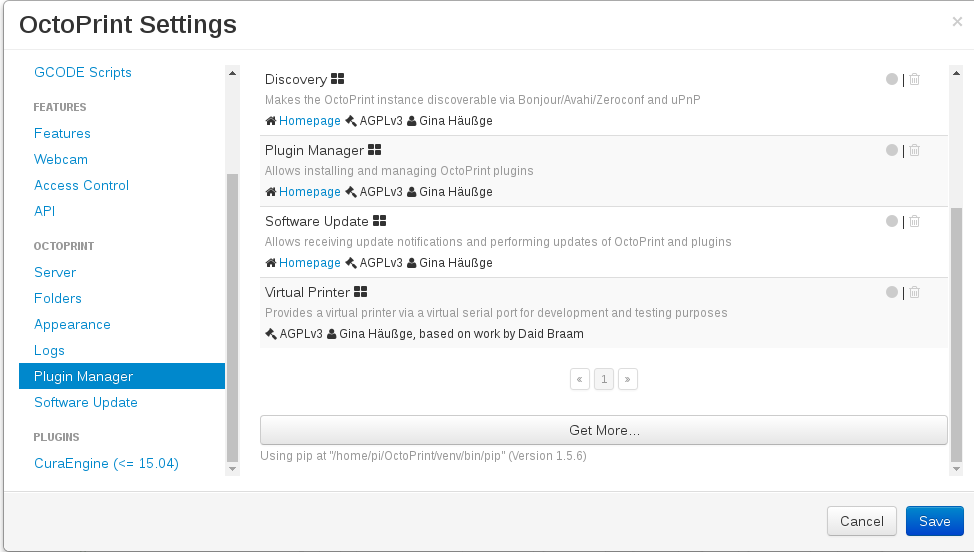
In order to install the plugin, go to Settings -> Plugin Manager and click on ‘Get more…’:
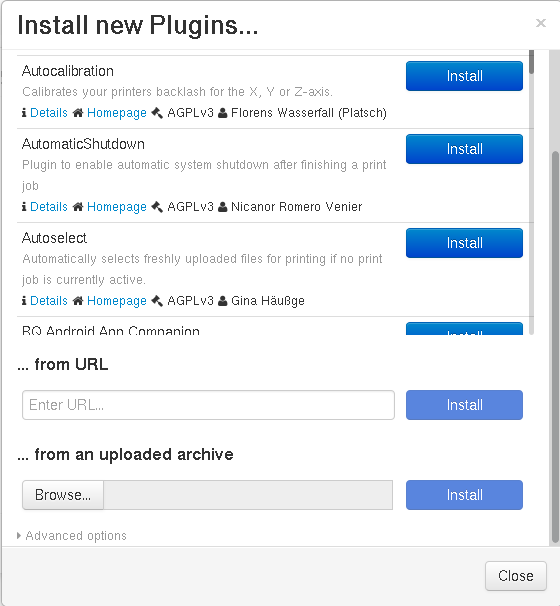
You’ll see an option to add it from an URL. Add https://github.com/OctoPrint/OctoPrint-Slic3r/archive/master.zip an click on ‘Install’ button.
At this moment, the plugin will be installed, but Slic3r must be downloaded and configured, which can be done following these steps:
-
If OctoPrint is running under a Raspberry Pi, you can use the following script to install Slic3r (unfortunately precompiled packages do not work for RPI’s architecture). For that purpose, copy the following code in a file (i.e. slic3r_install.sh).
#!/bin/sh echo "Shell script created by Javier Martínez Arrieta for Slic3r installation\n" #Ask the user for a version echo "Please indicate which version you desire to be installed (e.g. 1.1.7)" read version echo "The installation of Slic3r takes a long time. PLease be patient" cd $HOME echo "Installing required libraries and dependencies..." sudo apt-get install git libboost-system-dev libboost-thread-dev git-core build-essential libgtk2.0-dev libwxgtk2.8-dev libwx-perl libmodule-build-perl libnet-dbus-perl cpanminus libextutils-cbuilder-perl gcc-4.7 g++-4.7 libwx-perl libperl-dev sudo cpanm AAR/Boost-Geometry-Utils-0.06.tar.gz Math::Clipper Math::ConvexHull Math::ConvexHull::MonotoneChain Math::Geometry::Voronoi Math::PlanePath Moo IO::Scalar Class::XSAccessor Growl::GNTP XML::SAX::ExpatXS PAR::Packer echo "Cloning Slic3r repository..." git clone https://github.com/alexrj/Slic3r.git cd Slic3r git checkout $version echo "Building and testing Scli3r..." sudo perl Build.PL echo "If everything was installed properly,you should be able to run Slic3r with the command ./slic3r.pl" -
Save the file and allow execution giving permission. Using a terminal, it would be chmod +x slic3r_install.sh (or the name given to the file). chmod +x slic3r_install.sh
-
Now that you have permission to execute it, type ./slic3r_install.sh and press ‘Enter’. If it is the first time executing the installer, take into account that it can take about 30 minutes or even more. ./slic3r_install.sh
-
At the beggining of the installation, you will be asked which version should be installed (available versions at http://slic3r.org/download)

-
If you get an out of memory error it’s because Raspberry Pi doesn’t have enough swap memory to build Slic3r by default. You will need to increase the swap size. To do this, run
sudo nano /etc/dphys-swapfileand setCONF_SWAPSIZE=1000then save and reboot. After reboot, runfree -hand confirm that total swap size is around 1000MB. -
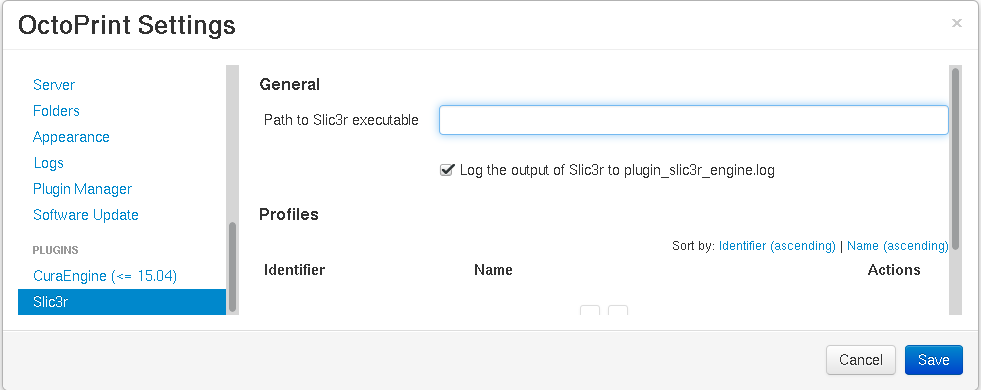
Execute OctoPrint and go to Settings (or restart when you are asked after installing the plugin). Slic3r should appear in Plugins list:
-
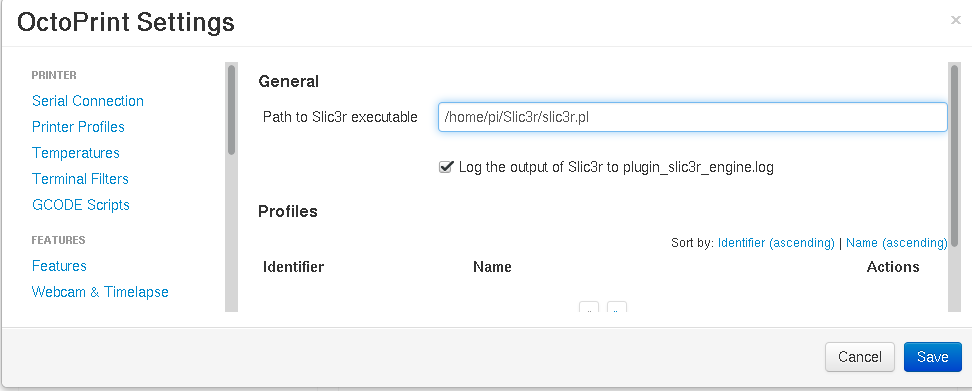
In ‘General’, you should put the following path for the executable (supposing the execution of the script, the path would be /home/pi/Slic3r/slic3r.pl). Note: If running in Windows, write the path to slic3r-console:
-
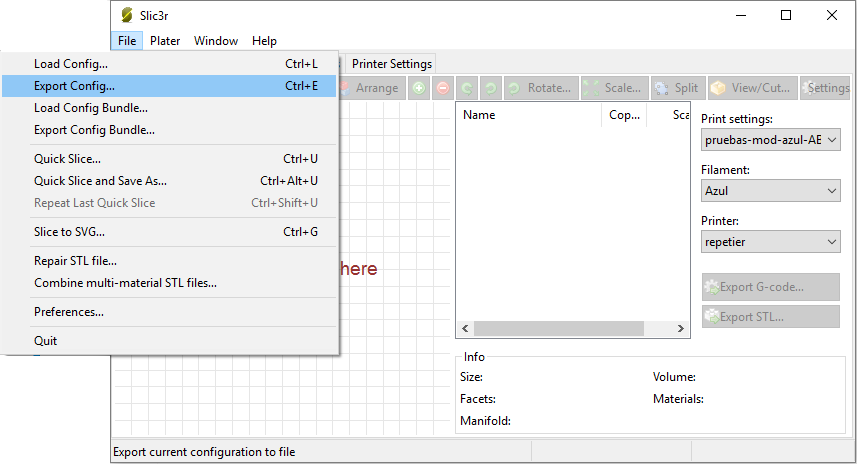
Before importing the profile, you have to export a file with the Slic3r’s configuration. For that purpose, open Slic3r, and select File-> Export Config…
-
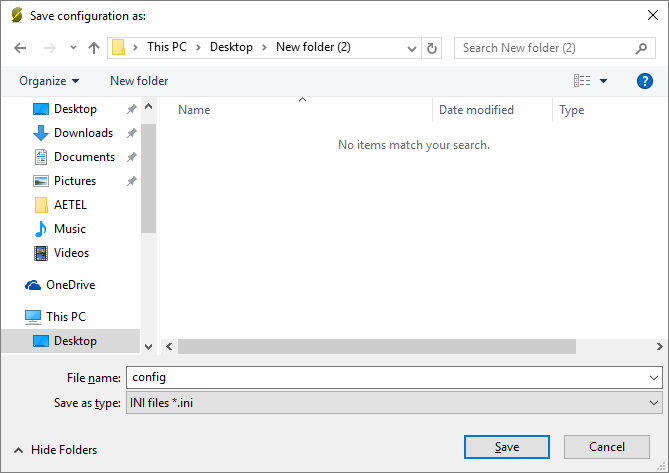
Save the file with the desired name (e.g. config.ini):
-
Once done, in ‘Profiles’ click ‘Import Profile…’ button:

-
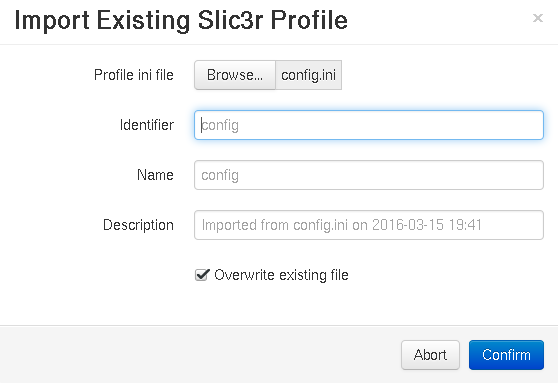
Click on ‘Browse…’ and search for the profile. Once done, save with the name and identifier wished by clicking ‘Confirm’:
-
Click ‘Save’ to confirm Slic3r settings:
-
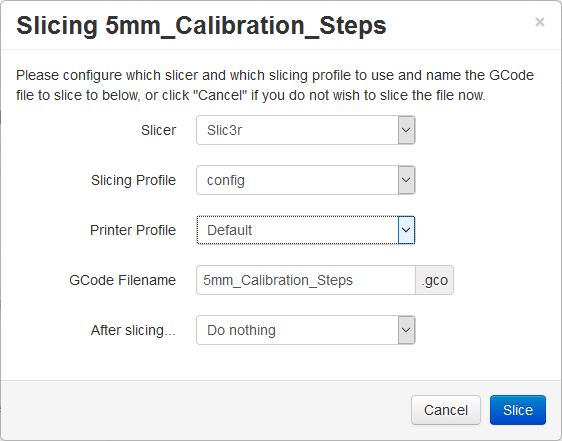
Now you can slice your stl files: