 Plugin Repo
A simple plugin to toggle a GPIO pin on a RPi. This can be toggled through a onscreen button, external button, printer events or custom GCODE.
A simple plugin that allows for the toggling of a GPIO pin on the Raspberry Pi. The user can toggle the pin through a button in the navigation bar, an external button, OctoPrint events and through custom GCODE commands. Printer events also allow the pin to be toggled on then off after a period of time.
Configuration
Main Light Settings
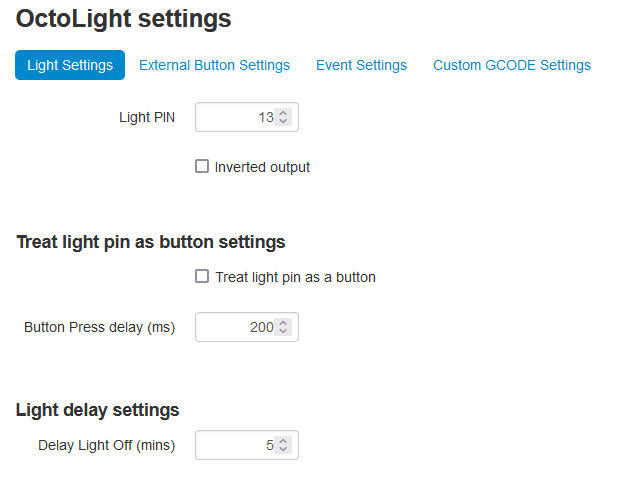
Currently, you can configure settings:
Light PIN: The pin on the Raspberry Pi that the button controls.- Default value: 13
- The pin number is saved in the board layout naming scheme (gray labels on the pinout image below).
- !! IMPORTANT !! The Raspberry Pi can only control the GPIO pins (orange labels on the pinout image below)
- !! IMPORTANT !! OctoLight will detect if the GPIO mode is set by another plugin, if not, the GPIO will be set to
BOARDmode, else it will useBCMmode. If the GPIO’s are in BCM mode, you will need to use the GPIO number instead of the pin number, for example, pin 13 is GPIO 27, so the pin should be set to 27.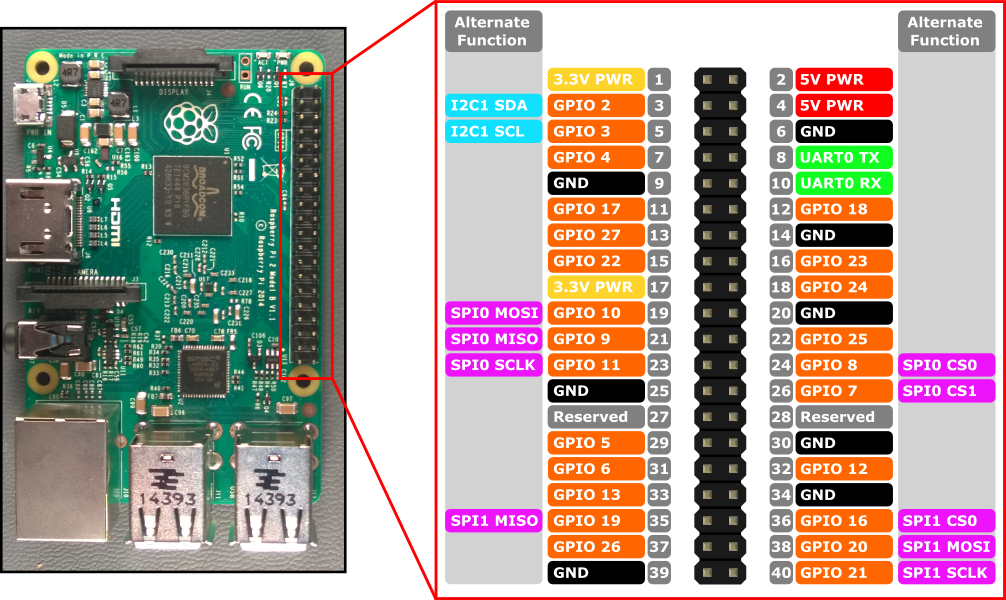
Inverted output: If true, the output will be inverted.- Usage: If you have a light, that is turned off when voltage is applied to the pin (wired in negative logic), you should turn on this option, so the light isn’t on when you reboot your Raspberry Pi.
Treat light pin as a button: If true, the output will be treated as a button press.- Usage: This function allows OctoLight to toggle the Raspberry Pi pin on and off with a small delay to allow for lights that require a button press to change states.
Button Press delay (ms): This sets a time out for how long a button press is, this is only used ifLight is a buttonis enabled.- Default value: 200
- Note: This value is in micro seconds.
Delay Light Off (mins): This sets a time out for when the light will automatically turn its self-off in an event.- Default value: 5
- Note: This value is in minutes.
External Button Settings
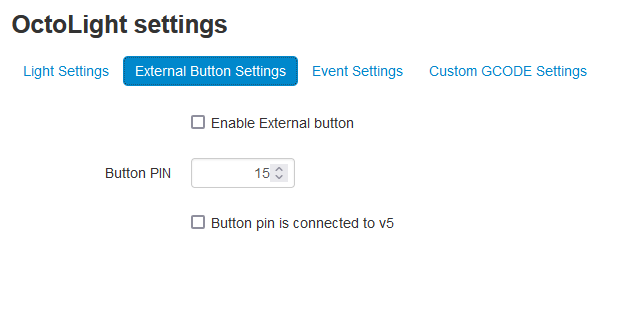
Enable External button: This allows the use of an external button to change the state of the light.- This setting is not enabled by default, this setting must be on to use an external button
Button PIN: The pin on the Raspberry Pi used to detect a button press.- Default value: 15
- The pin number is saved in the board layout naming scheme (gray labels on the pinout image).
- !! IMPORTANT !! The Raspberry Pi can only control the GPIO pins (orange labels on the pinout image)
- !! IMPORTANT !! OctoLight will detect if the GPIO mode is set by another plugin, if not, the GPIO will be set to
BOARDmode, else it will useBCMmode. If the GPIO’s are in BCM mode, you will need to use the GPIO number instead of the pin number, for example, pin 15 is GPIO 22, so the pin should be set to 22.
Button pin is connected to v5: This sets the button pin to detect when the pin receives a current- The default is disabled
- If you button pin is connected to a button that is connected to a ground pin, this setting should be disabled. However, if you connect the button to a v5 pin, this setting must be enabled.

Event Settings
Setup Printer and OctoPrint Events: This allows you to select what you would like the light to do on a printer event.- There are multiple events, these can each be tweaked based on your desired preference.
- Default is set to ‘Nothing’.
- Set the light to do nothing, turn on, turn off, or turn on then turn itself off after the delay time value.
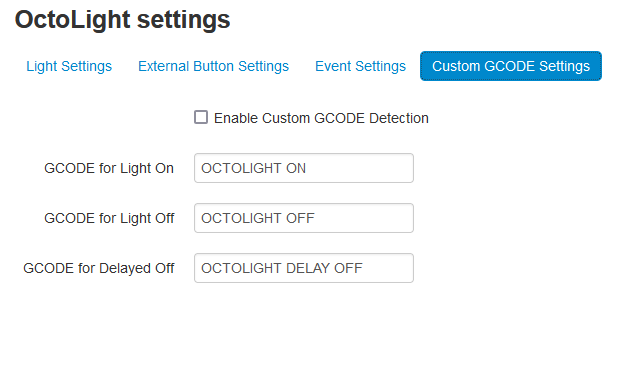
Custom GCODE Settings
Enable Custom GCODE Detection: This must be enabled for GCODE to be read and toggle the light.- If this option is disabled, then the custom GCODE bellow this option will not function.
Setup Custom GCODE: This allows you to select what you would like the light to do when a set GCODE command is sent to the printer.- Default is ‘OCTOLIGHT ON’, ‘OCTOLIGHT OFF’ and ‘OCTOLIGHT DELAY OFF’ for on, off and on with a delayed turn off respectively.
- These commands can be any command the user enters, these could be event commands for the printer (e.g.: M600) or custom commands.
API
Note: OctoLight supports API calls, please go to the following link to check the latest information: https://github.com/thomst08/OctoLight#api
Pictures