Tool to automatically start the printer and prints remotely
Concept
The octoprint autoprint plugin has the following functionalities:
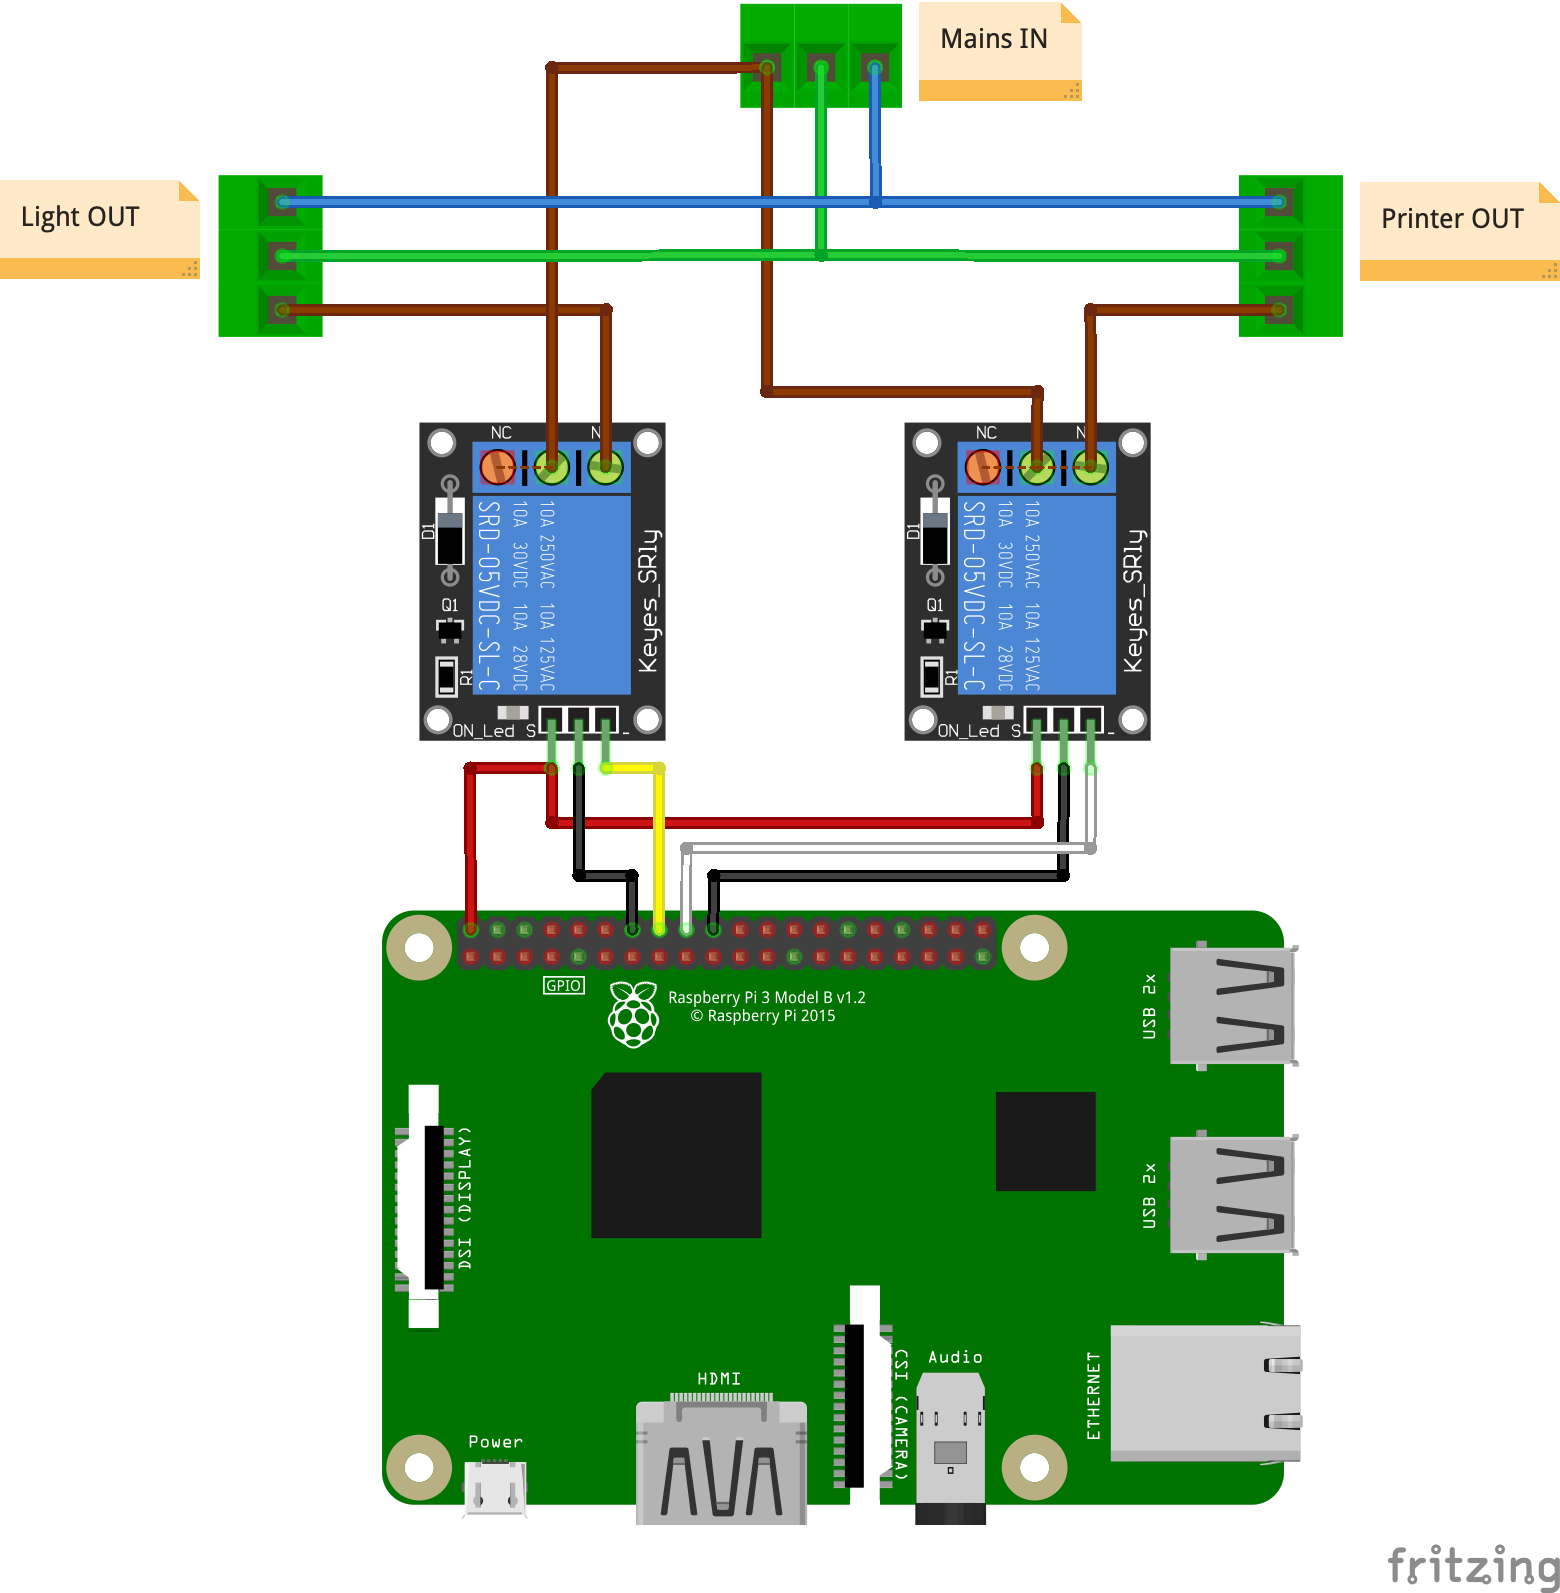
- Enable the remote powering on/off of a printer and a light above the printer via two distinct GPIO pins (which are most likely connected to relais) - also exposing these GPIOs
- Automatically disconnect and turn off the printer after a print is finished - with the option to wait for a proper cool down of the nozzle
- Start the printer and begin printing a specific file either at a given time or at a time so that the print will be finished as specified
- Automatically turning off the printer after the scheduled print job has finished
To fully use the autoprint plugin you need to be able to control your printers power supply as well as the light illuminating the printer via GPIOs and e.g. attached relais that are switching the power (see also the example below).
Use
Settings
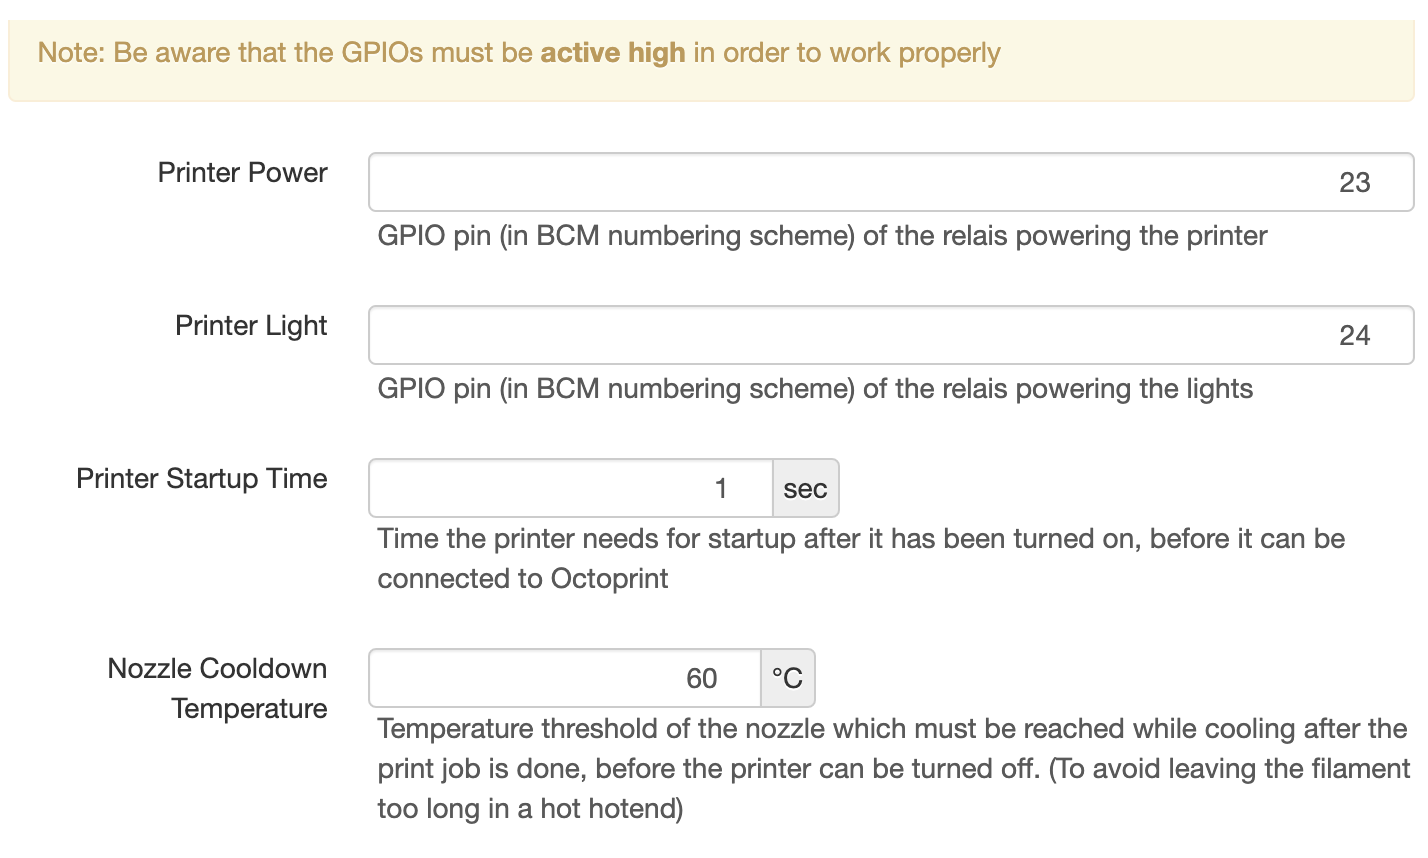
The plugin can be configured with the following parameters (see also screenshot “Settings” below)
| Parameter | Type/Default | Description |
|---|---|---|
| Printer Power | GPIO Pin Number (BCM) | GPIO Pin triggering the power of the printer - this is usually connecte to a relay |
| Printer Light | GPIO Pin Number (BCM) | GPIO Pin triggering the lights of the printer - should also be connected to a relay or a MOSFET turning on/off a led strip |
| Printer Startup Time | Seconds | Time delay the plugins waits after starting up the printer before it tries to connect to it |
| Nozzle Cooldown Temperature | °C | After printing or when getting a shutdown command, the plugin waits until the nozzle has cold down below this threshold to avoid turning off the printer with a too hot hotend |
Operations
The plugin offers several options of useage:
Manually turning on the power of the printer and lights:
-
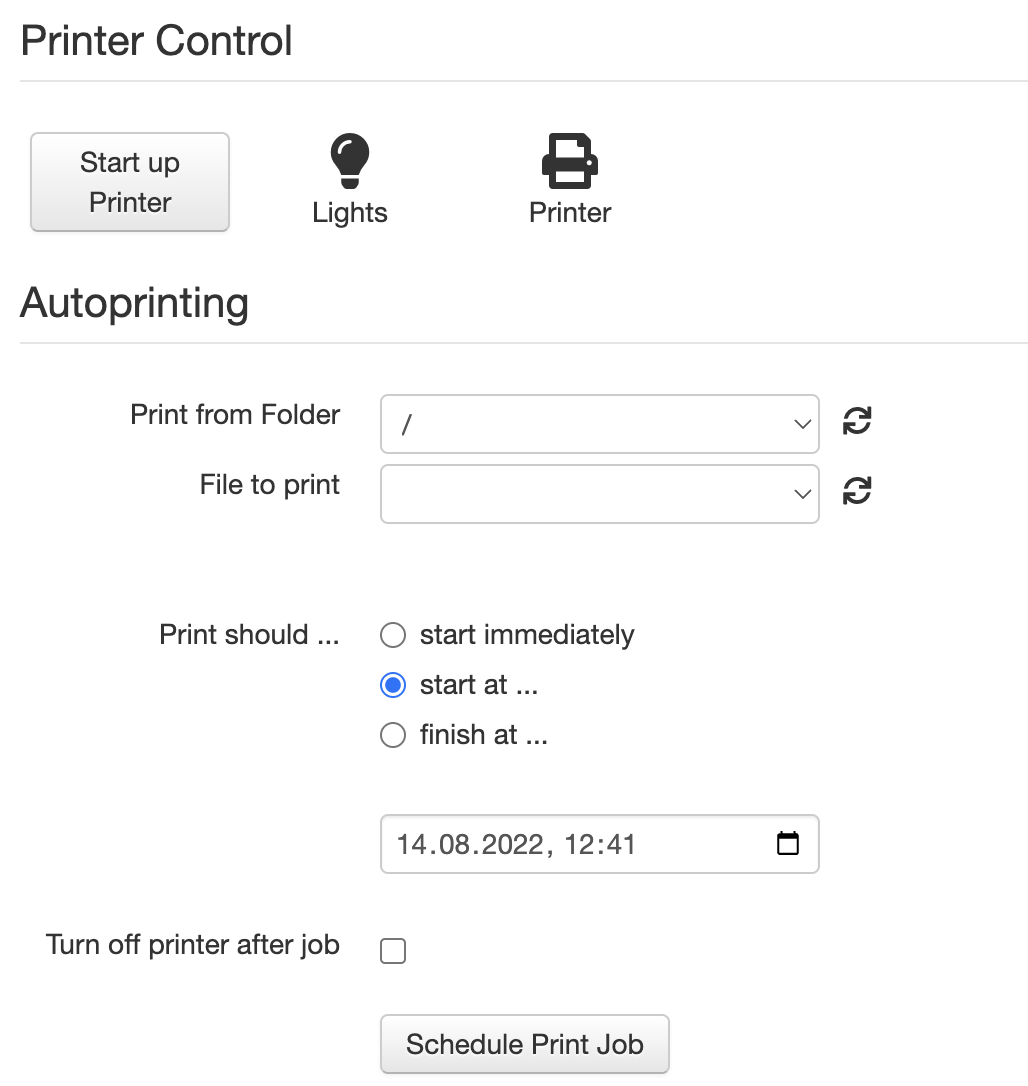
You can use the “Start up Printer” button on the top left to switch the printer and the lights on and off at the same time. If the printer is on the button is showing the alternate text “Shut Down Printer”
-
As soon as the printer and/or the lights are on the icons right of the button switch to the color yellow
-
After the printer has been turned on and the startup time has passed (configuration), the plugin will try to connect octoprint to the printer
-
As soon as the printer is connected the printer icon turns green
Manually turning off the printer and the lights:
When the printer is on (and connected) the button on the top left corner of the tavb shows “Shut Off Printer”. In this state you can turn off the printer at any time which will trigger the following process:
-
Wait until the printer hotend has cooled down sufficiently (below the configurable Nozzle Cooldown Temperatur)
-
As soon as the nozzle is cool enough the printer will be disconnected from octoprint
-
Lights and printer are shut down
During the cooldown process you can cancel the shutdown of the printer at any time by pressing the button on the top left which is in this phased labelled as “Cancel Shut Down”
Note: The lights icon is also triggering the lights. When clicking on it you can toggle the state of the lights regardless of the state of the printer (e.g. for turning on the lights to check your printer while off or for turning them off while printing)
Autoprinting
The plugin allows to schedule a print for a later time with the following options:
- Select a file from a any folder
- Choose to start immediately or select either the start or the end time
- Check wether the printer should shutdown after the print has finished
The autoprint controls are available on the tab of the plugin (see picture below) and are only available if the printer is neither printing, paused nor pausing a print.
A printed job can be cancelled any time before the print starts.
File Selection
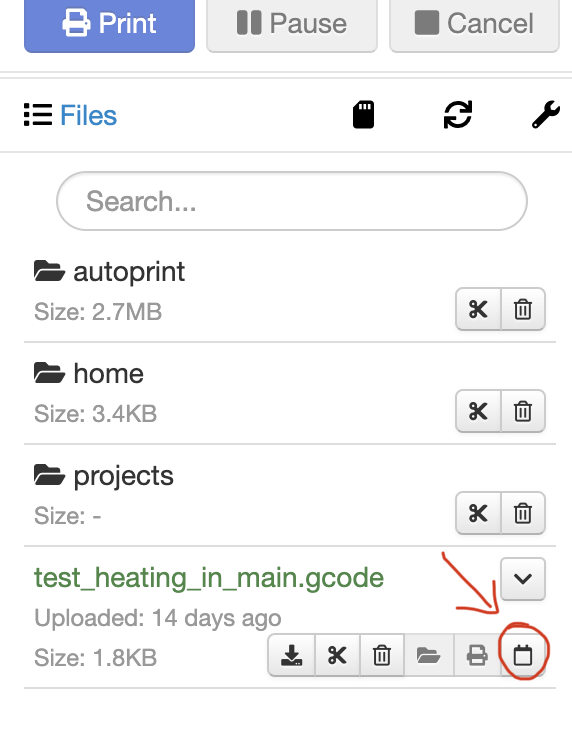
For selecting the file you can either use the two drop down combo boxes, first selecting the folder and then the file, or you can go to the file browser in the sidebar and press on the small calendar button that appears there after the installation of the plugin. - This will automatically fill the folder and filename in the two combo boxes on the tab.
Warning: The plugin does not check any precondition for printing a scheduled job except the calculated time. Be therefore aware that the printbed and all other conditions must be given when scheduling a print job. There are no checks done by the plugin. The job is simply started regardless of the real conditions.
Warning: Be aware that running print jobs unattended is a security risk and should not be done in general.
Next steps
- Integrate autoprint plugin with other plugins:
- FilamentManager
Pictures


 Plugin Repo