This plugin implements three features, filament change buttons, filament sensor manager and filament remover when the print is completed.
FilamentBuddy
This plugin implements three features: filament change buttons, filament sensor manager and filament remover when the print is completed.
These three features are independently implemented so, they can be activated separately.
Filament Changer
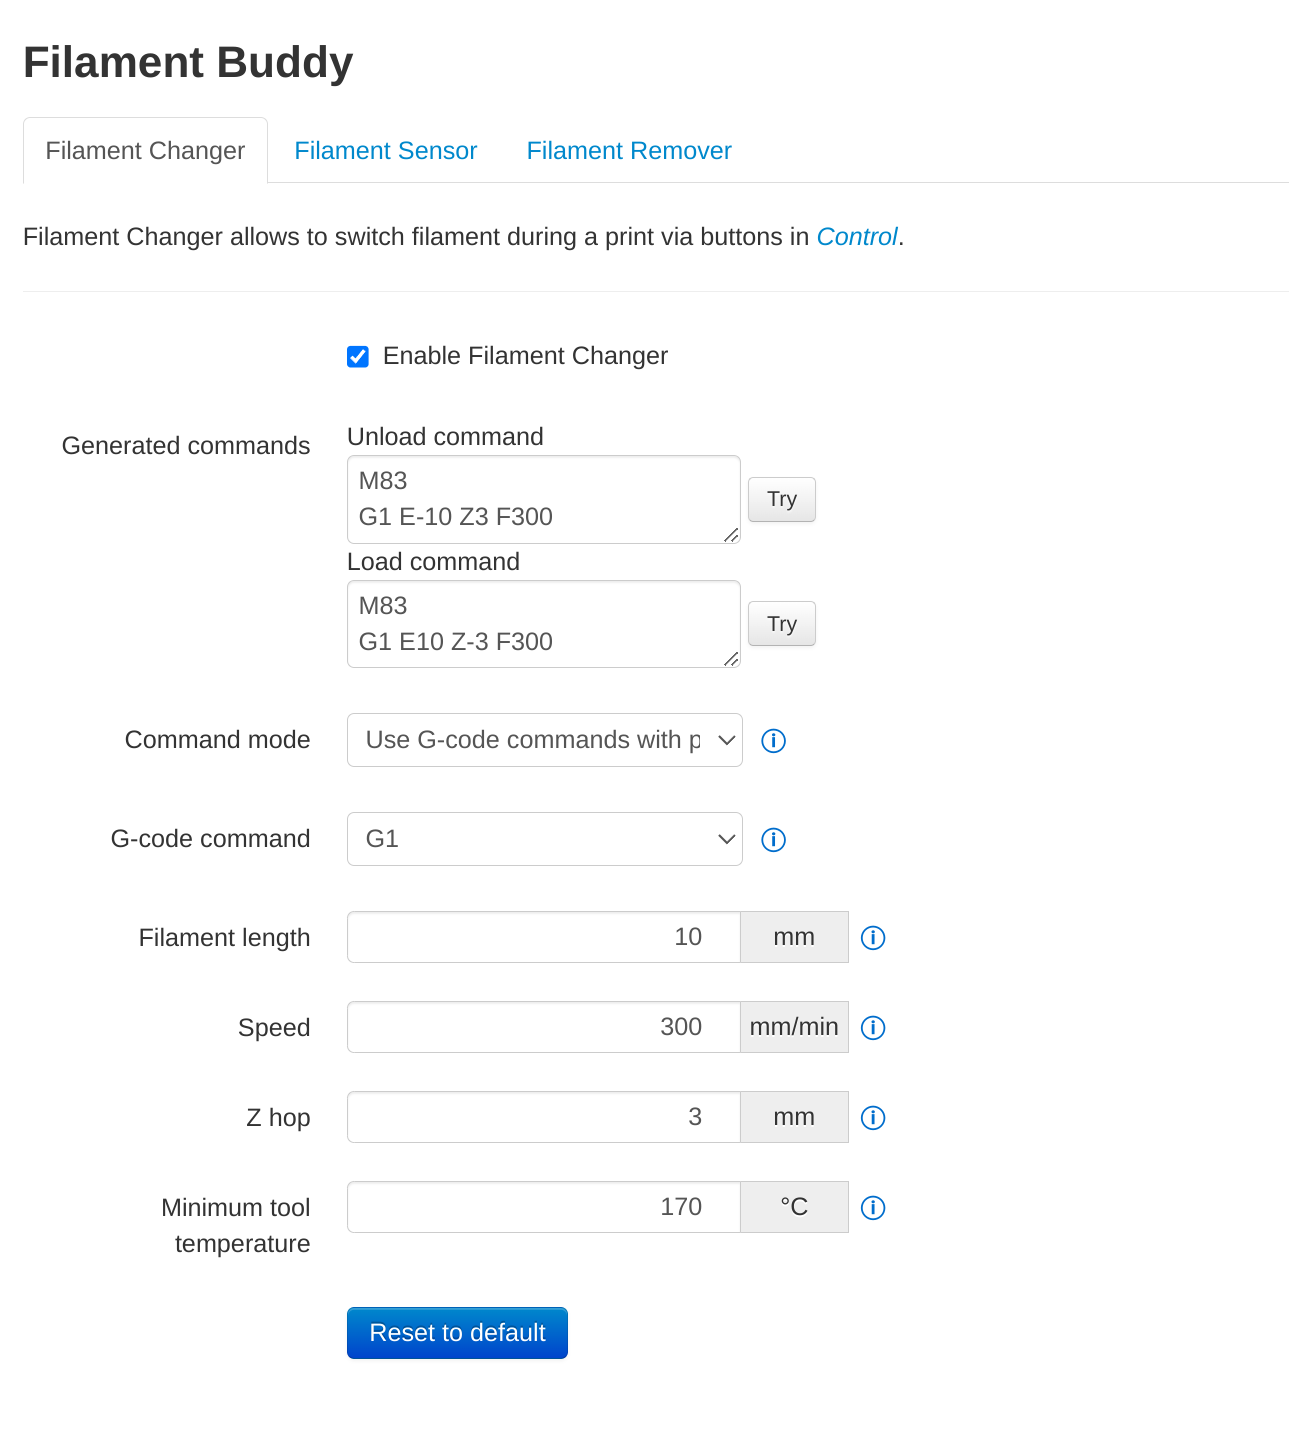
This feature implements two buttons in the control section to change the filament. Their role is to remove and to insert the filament sending G-code command, which can be configured by the user via the settings page. This last page has two methods of configuration: one guided and one completely free.
Filament Sensor
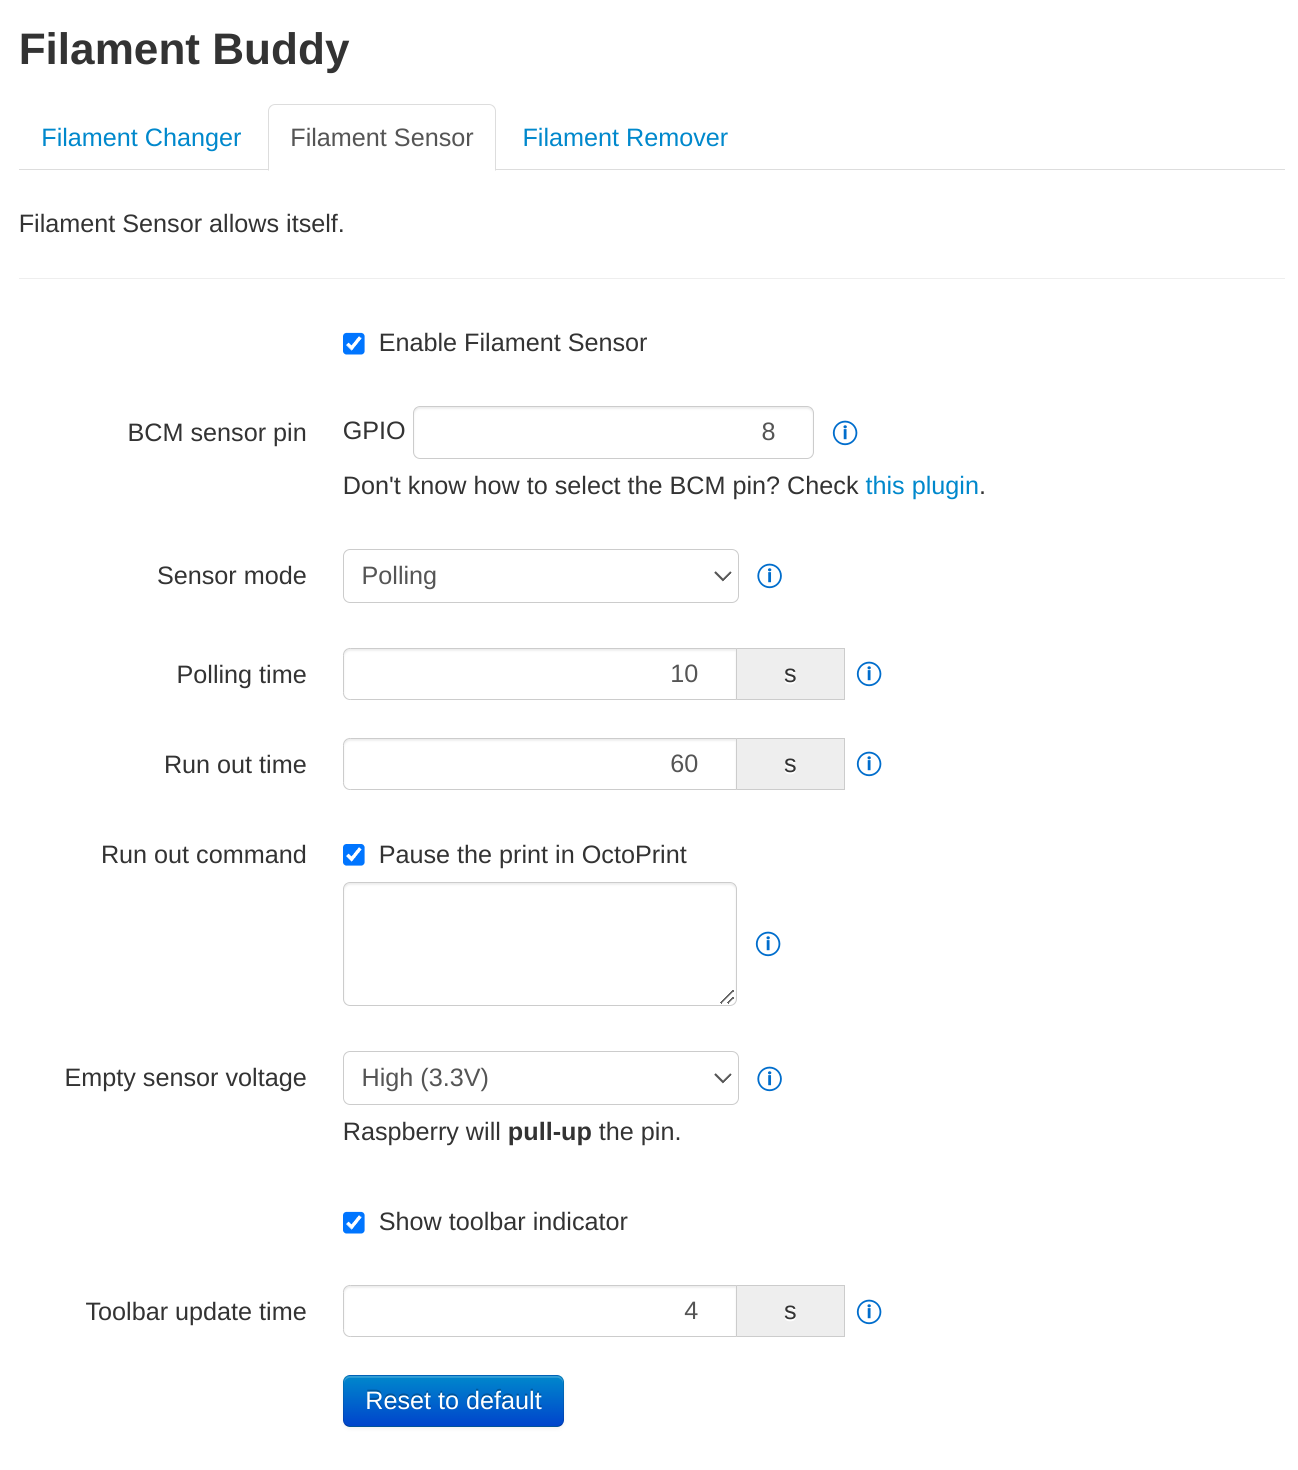
This functionality allows to monitor the filament availability via a hardware sensor, which sends this information via a proper GPIO pin. When the plugin, during a print, notices that the filament has run out, it pauses the printer, avoiding it to fail and waiting for filament replacement, which can be done by hand, by another plugin or, better, via the feature Filament Changer. This plugin also has a toolbar indicator to signal if the filament is inserted or not and a run out MQTT notification.
The currently supported sensors are the ones that uses a binary digital value, one for the filament inserted and the other where it is not. Moreover, there are a lot of configurations that can be configured in the settings page to more meet every user needs.
Remember that the Raspberry works with digital pin to 3.3V, so keep this in mind when connecting stuff to the GPIO. Moreover, always check multiple times every connection before turning on the board since there is always the risk to seriously damage the hardware.
Filament Remover
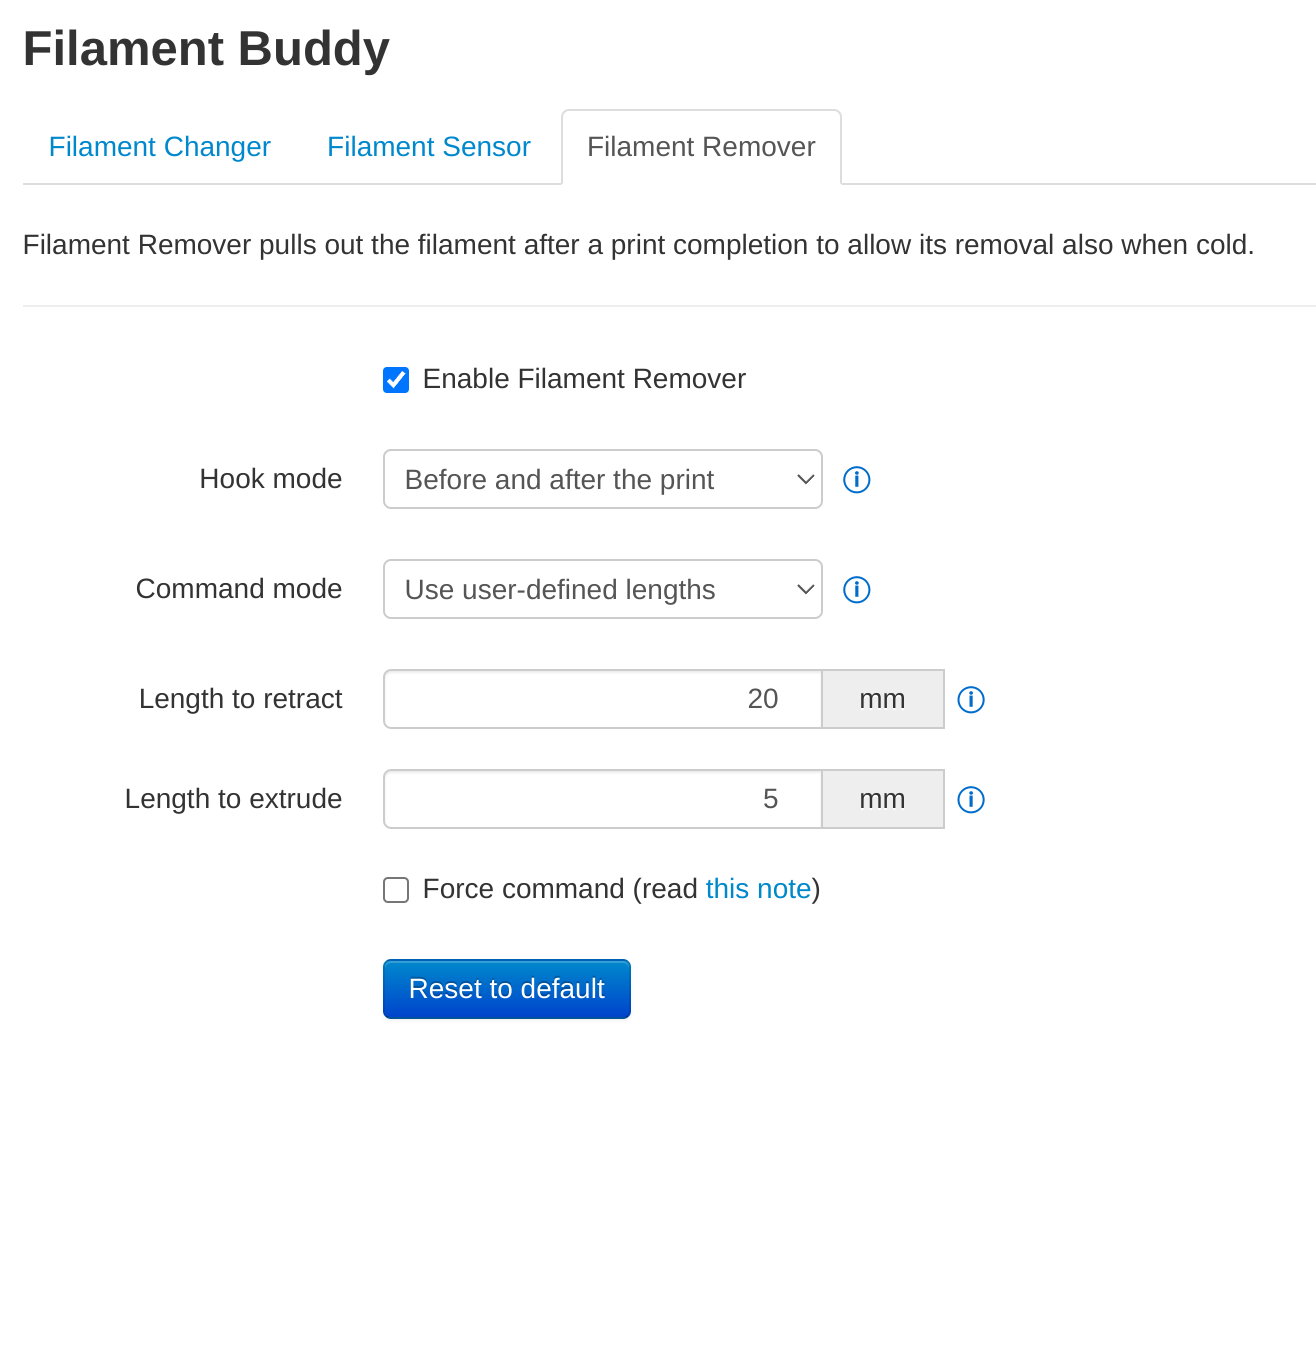
Sometimes happens that, when the print is over, the nozzle cools down with the filament still inserted, requiring to heat it up again to remove it. This feature solves this issue, running a user configurable G-code snippet to remove the filament when the printer ends, fails or is canceled. It also has the possibility to automatically insert the filament before printing.
Setup
Install via the bundled Plugin Manager or manually using this URL:
https://github.com/danieleborgo/OctoPrint-FilamentBuddy/archive/master.zip
All the stuff that the plugin needs to work are automatically installed via OctoPrint plugin manager, so no other software are needed.
In some configurations, some parameters cannot be used, consequently there is a mechanism to hide the values that the user cannot set, to avoid confusion.
Limitations
This plugin is thought to run on a Raspberry with a Marlin printer but, if properly configured, Filament Changer and Filament Remover could also work on different boards and printers. Despite this, these two would require to manually specify the G-code commands to perform these operations.
The Filament Sensor module is different since it uses a Python module specifically developed for the Raspberry boards, gpiozero, so it has this board as prerequisite. Nevertheless, Marlin is not a requirement, since it only uses OctoPrint functionalities. In the case FilamentBuddy is not running on a Raspberry Pi, the plugin will disable this feature.
Setup
The three features can be used independently, hence if the user needs just one or two of them, can just disable what is not wanted.
On the first startup, everything will be disabled and, through a notification, the plugin will remember to the user to do the first configuration. This can be done via a guided procedures or directly setting all the parameters.
Help
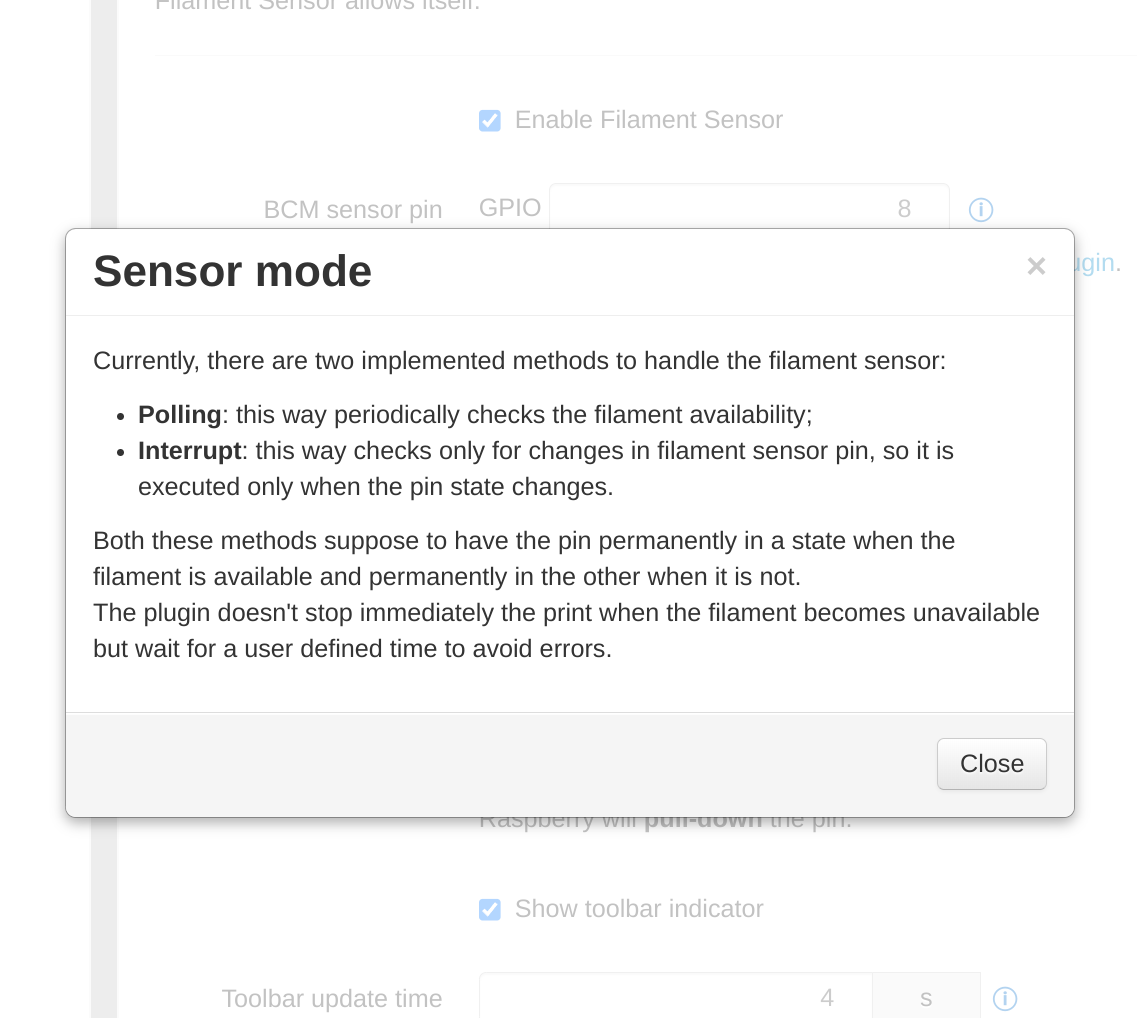
 Almost all the parameters in configuration have on their side a button
that, if clicked, shows an explanation of what that value is meant to do.
For some users, these explanation may seem too detailed but they are
thought to be complete.
Note for developers
Since it is impossible to cover all the available filament sensors on the market, this plugin is easily extensible to support other models in the future. More in details, it has an abstract class named GenericFilamentSensorManager, which can extended to support new sensor, implementing its abstract methods, which are, hopefully, generic enough. The plugin instantiates these in the initialize_filament_sensor method and it treats them as the abstract class, so it can support multiple different filament sensors without changing other code parts.
FAQ
Can I use just one feature among these three?
Yes, it is possible to use just what you need, enabling just the feature that are needed.
I don’t know what a parameter is, what do I do?
On the side on almost all parameters in configuration, there is a button that shows an explanation of what that value represents.
If I don’t like the guided procedure, can I skip it?
Yes, you can set the mode as you like, even specifying your G-code commands directly, if you need, or you do not have a Marlin printer.
Which filament sensors does this plugin support?
Currently, it supports some digital ones, so the sensor that uses a voltage value to define the filament availability and the other when it is not. Into the configuration page, it is possible to define if the filament is available when the voltage high or low. From my limited experience, these are the sensors I can find more easily. Since the filament sensor has been made generic, there may be new filament sensors implemented in the future.
How do I select the correct pin to connect the filament sensor?
There is not a real answer to this question since it depends on what the user needs. The plugin just requires a just BCM pin, and they can be identified by the name starting with GPIO, as shown in this plugin.
Why do some parameters disappear when configuring?
Some configurations are available only when certain conditions are met. For instance, in Filament Changer, some features configurable for G0 are not available for M600 and the other way around. To avoid confusion, the plugin just shows only what is available for that configuration.
Which are the limitations? Does it work on other boards?
Check the section limitations.
Why do filament changer or remover not work?
Some Marlin printers may have a check regarding the temperatures before moving the extruder. So if the nozzle temperature, or the bed one, are lower than a predefined threshold, the commands for the extruder are not executed. Since, in some cases the printer is still hot enough to perform these operations, it is possible to disable this check through the command M302 P1. For these cases, check the flag Force Command in their settings page.
Screenshots
More images available here.
License
This software is distributed on GPLv3.0, more information available in LICENSE.md.
Pictures


 Plugin Repo